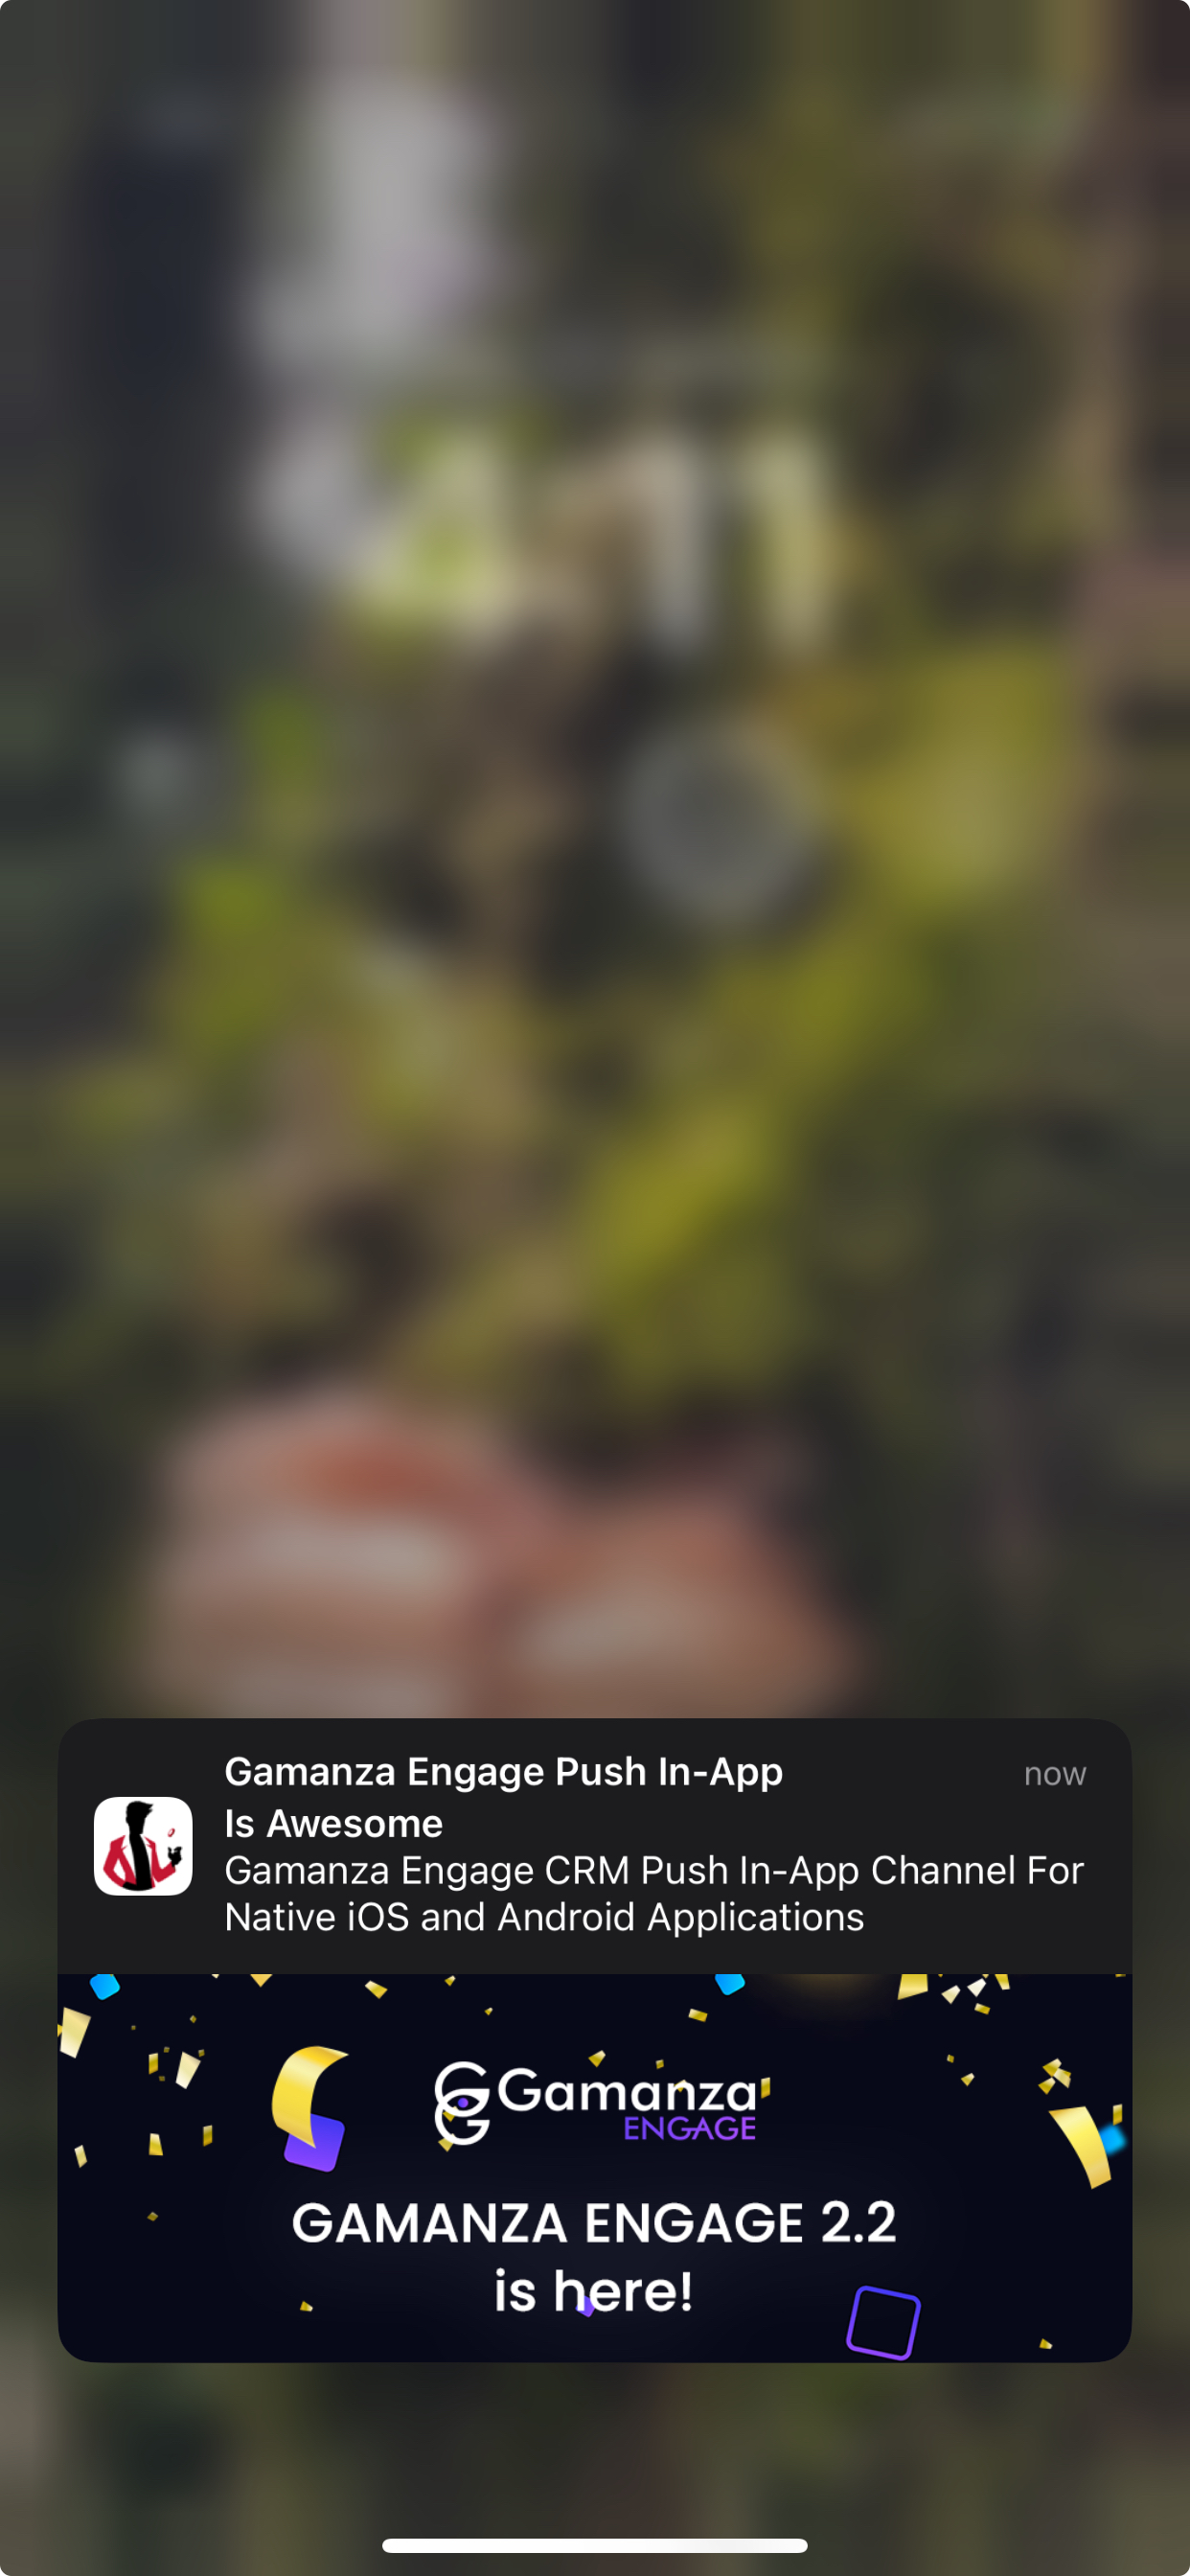
In App Push Notifications Configuration
Gamanza Engage allows to send native iOS and Android Push Notifications to your mobile users through our CRM. This is powered by OneSignal, please follow this guide to ensure a proper configuration.
Requirements
To ensure the proper functionality of the In App Push notifications the following requirements should be meet:
- OneSignal External ID should be populated with the Player ID
- You need to register the OneSignal subscription into our CRM by sending this request with the required information
- Configure the OneSignal App ID and API Key in your Admin instance under the System Settings Section or Contact your Customer Success Manager.
Configuration
Please follow the OneSignal configuration for iOS and Android is required by the OneSignal documentation.
Configure OneSignal - iOS
OneSignal sends push notifications through Apple's APNS service. You will need to provide OneSignal with your Apple Push Notification certificate generated on https://developer.apple.com
A complete guide for this is available on OneSignal's website at https://documentation.onesignal.com/docs/generate-an-ios-push-certificate.
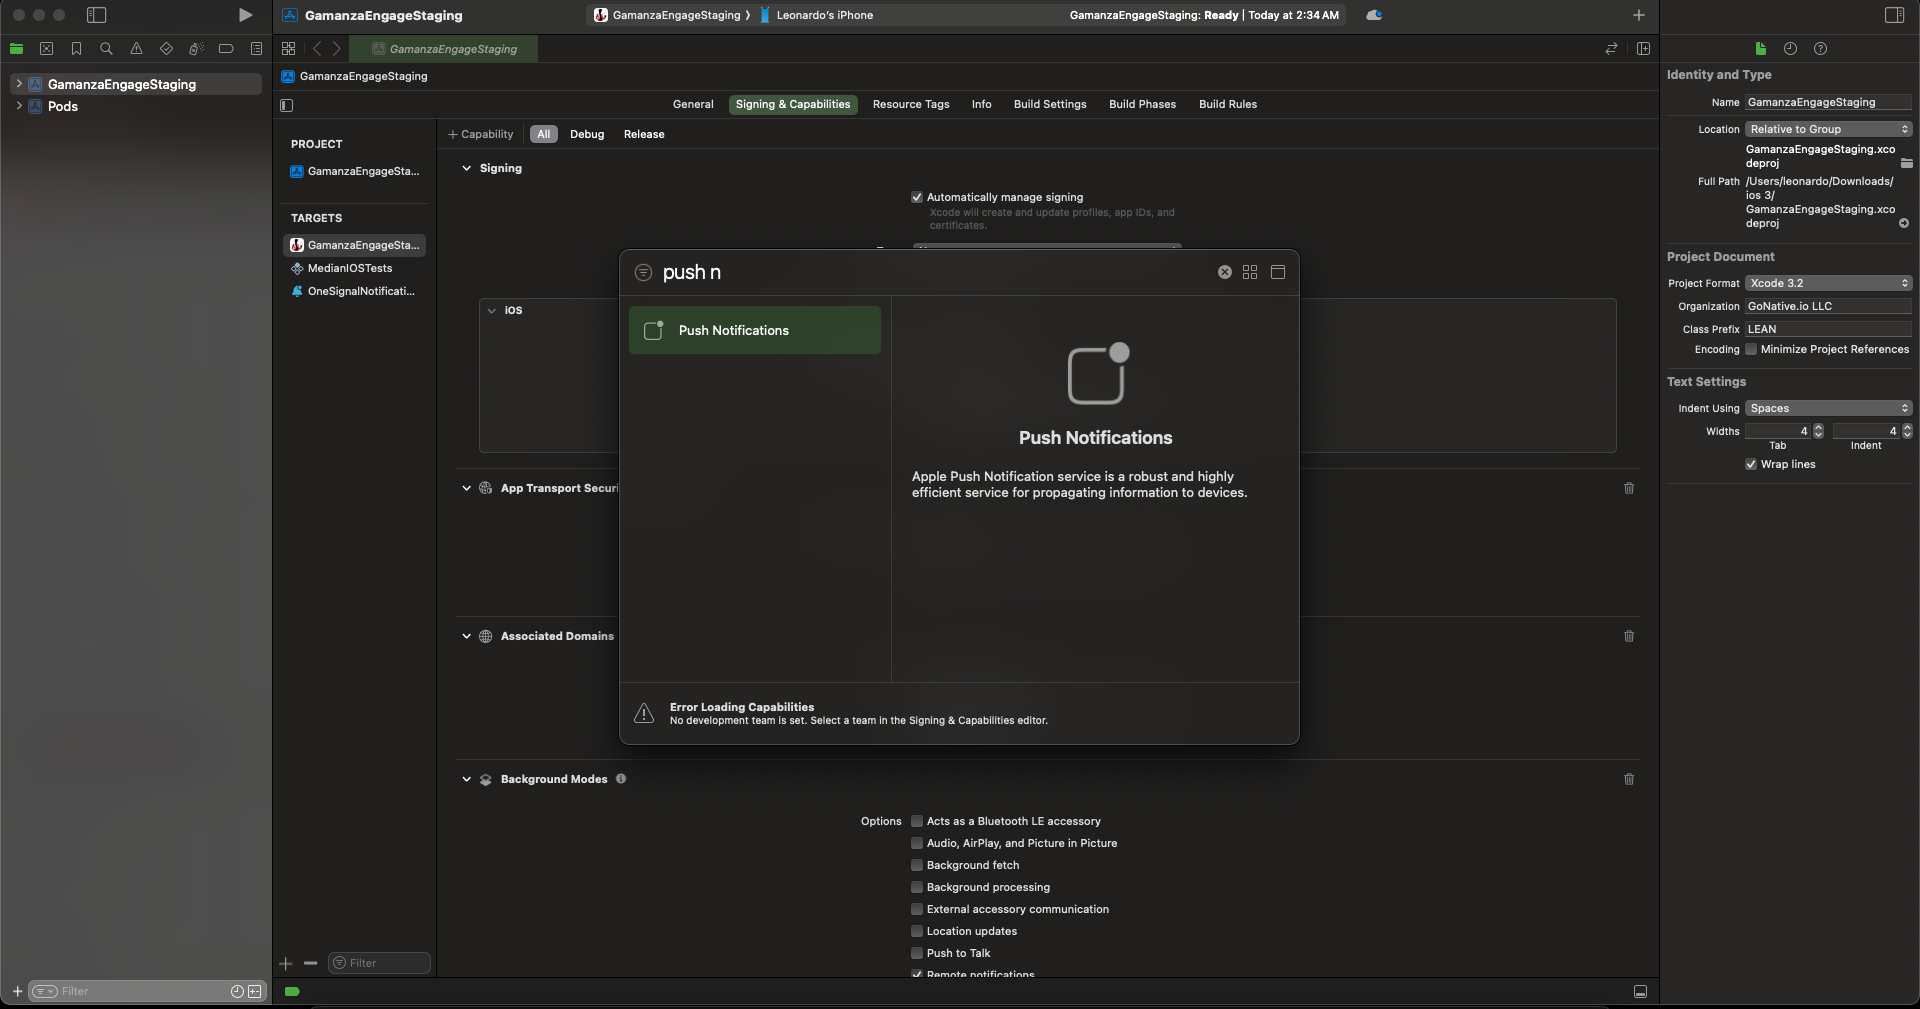
1. Add capabilities
This step will make sure your project is able to receive remote/push notifications.
Select the root project > your main app target > Signing & Capabilities.
If you do not see Push Notifications enabled, click + Capability and add Push Notifications.
iOS Push Notification Capability Required
Prior to publishing your app add the Push Notifications Capability within Xcode as shown below
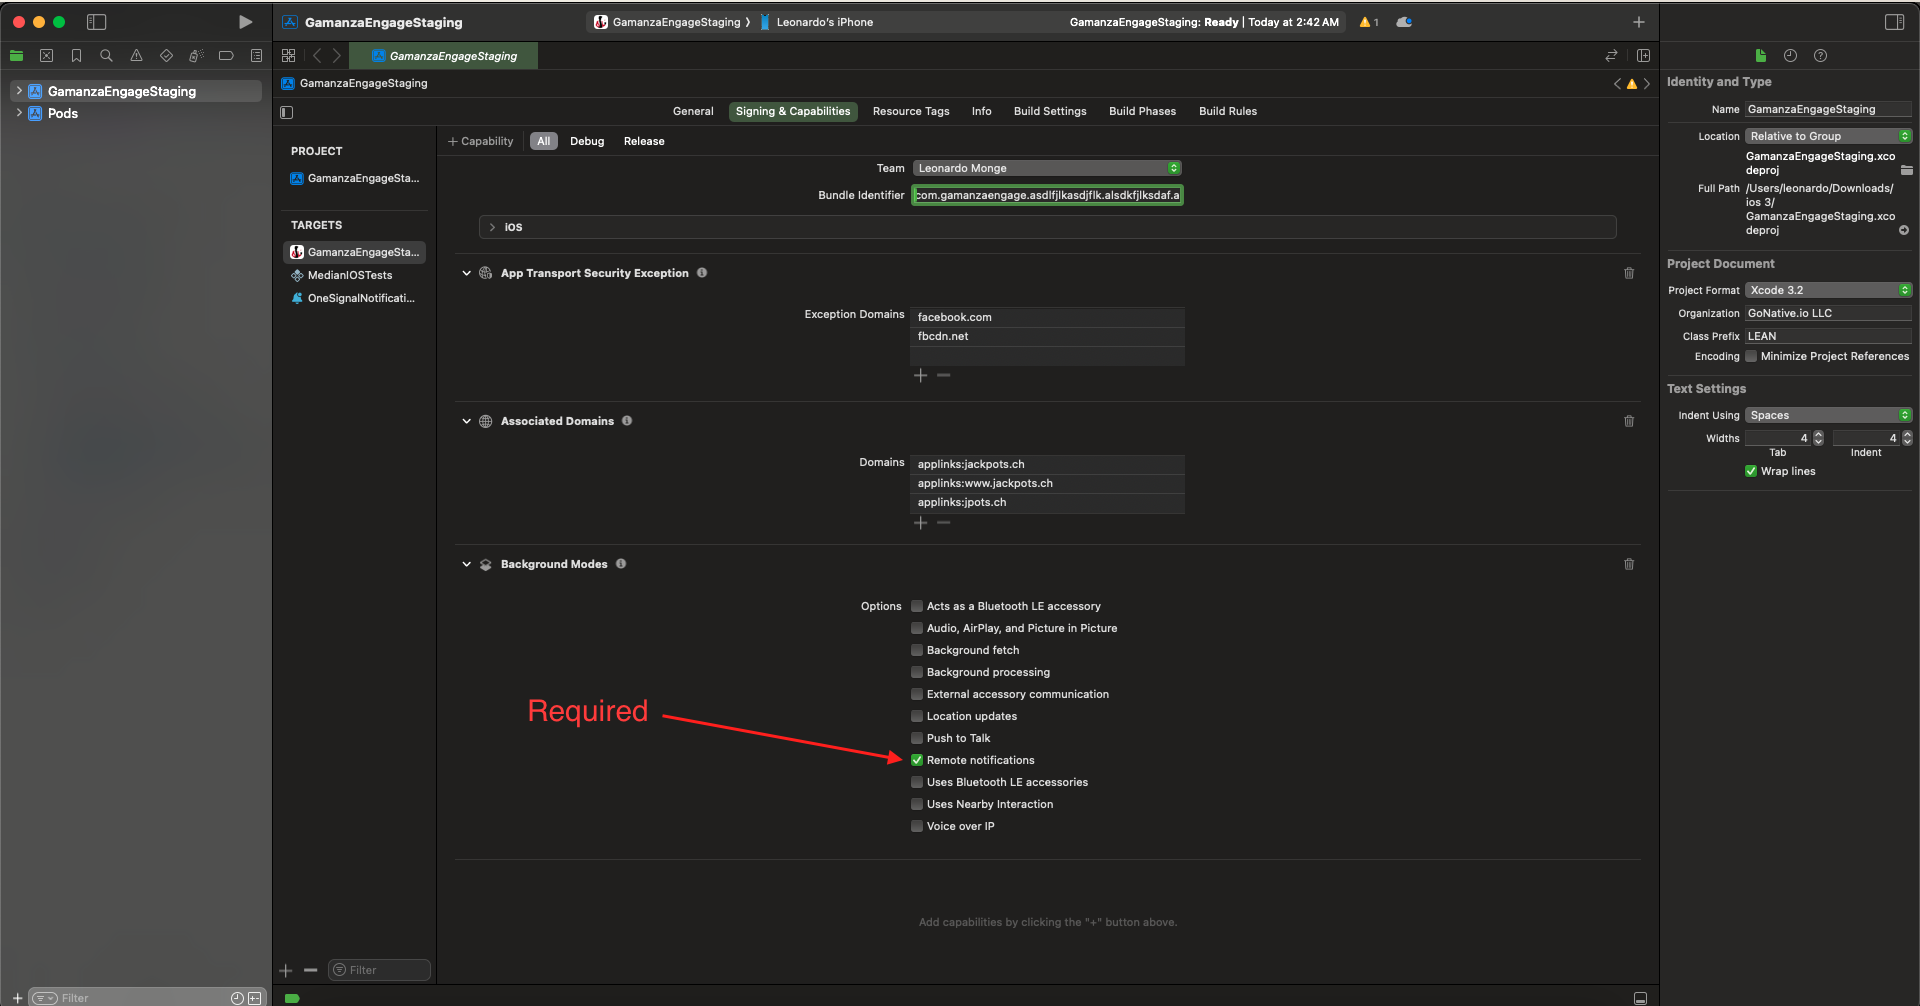
Click + Capability again and add Background Modes. Then check Remote notifications.
2. Add Notification Service Extension
The OneSignalNotificationServiceExtension allows your iOS application to receive rich notifications with images, buttons, and badges. It's also required for OneSignal's Confirmed Delivery analytics features.
In Xcode Select File > New > Target...
Select Notification Service Extension then Next.
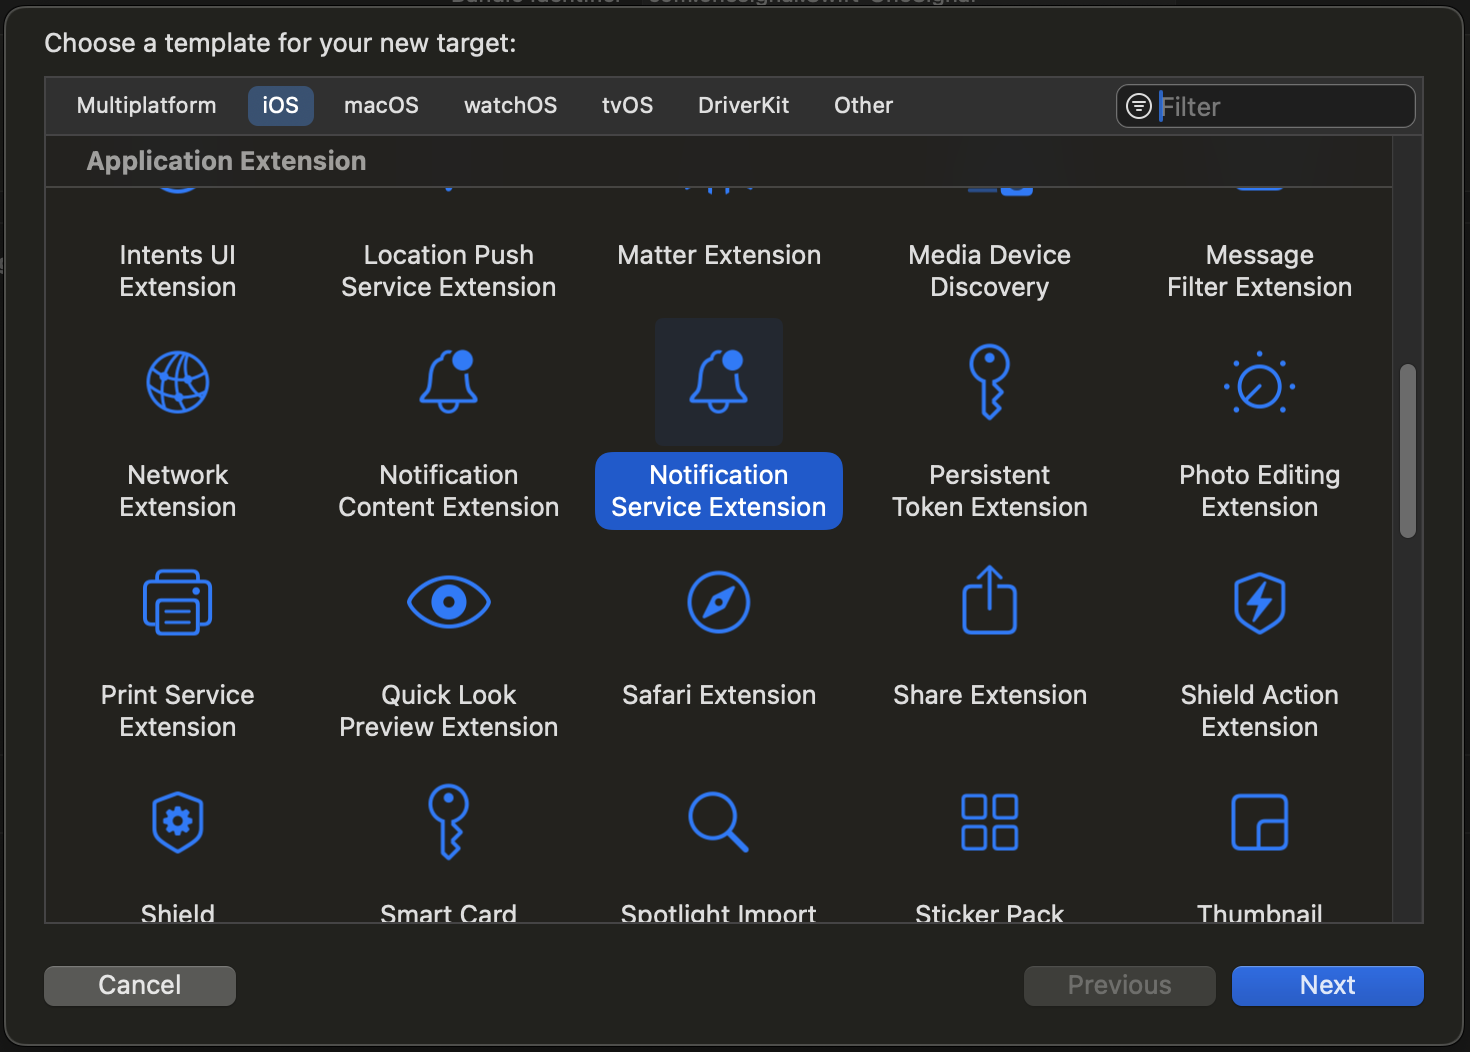
Enter the product name as OneSignalNotificationServiceExtension and press Finish.
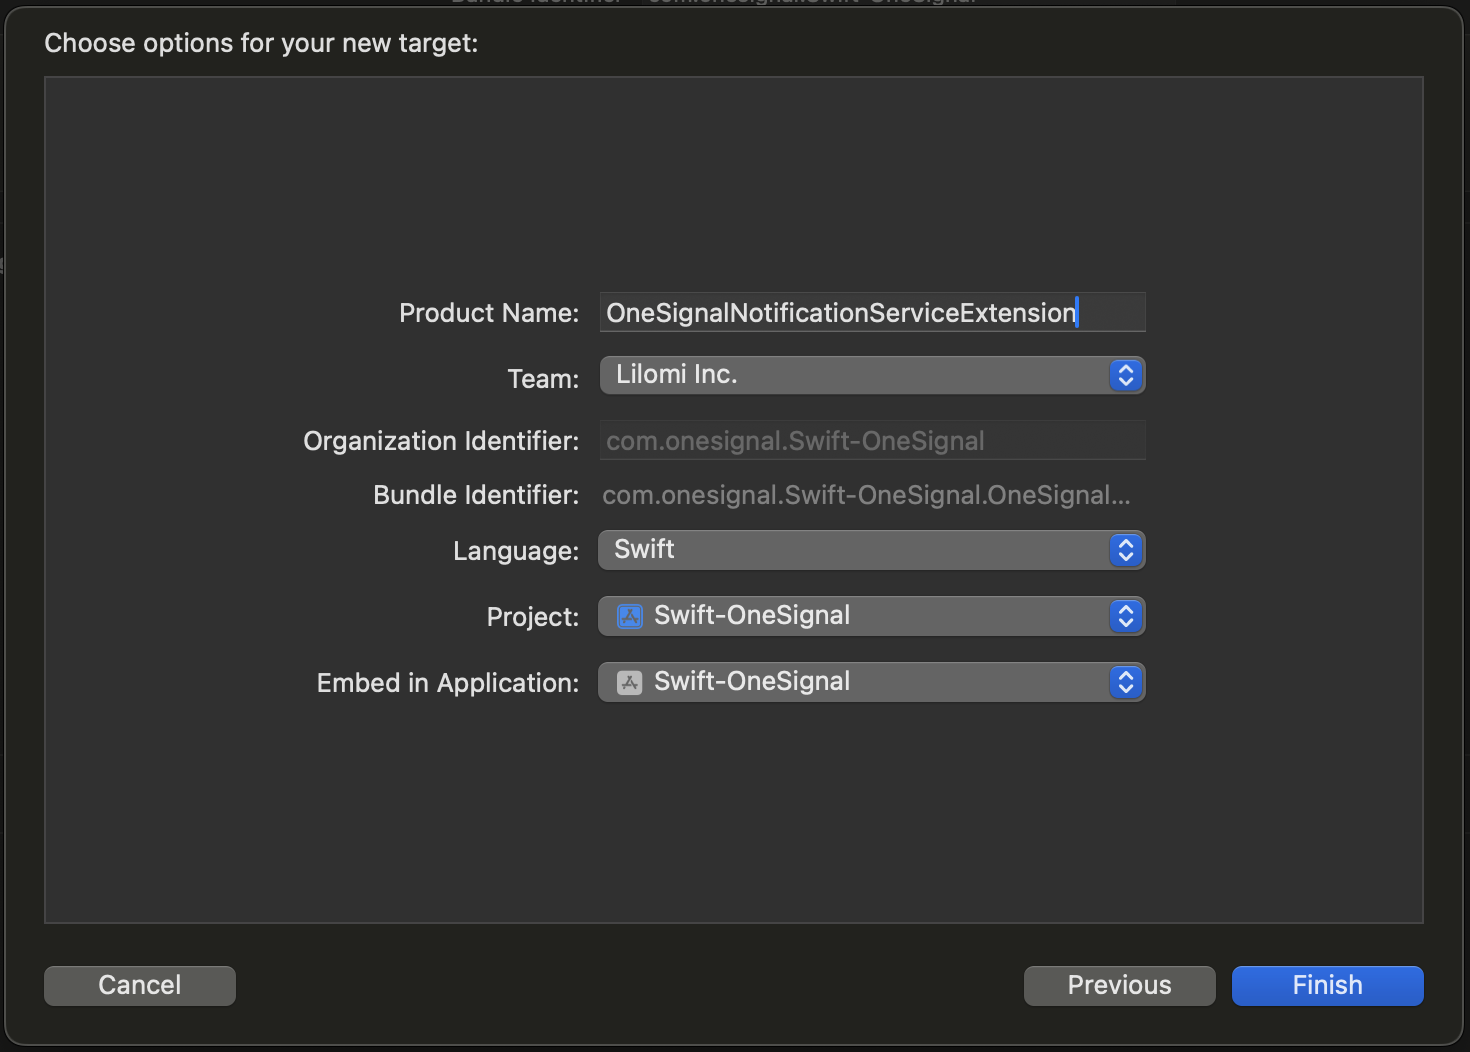
Do not activate the scheme on the dialog that is shown after selecting "Finish".
Press Cancel on the Activate scheme prompt.
Select the OneSignalNotificationServiceExtension target and General settings.
Set Minimum Deployments to be the same value as your Main Application Target. This should be iOS 15 or higher.
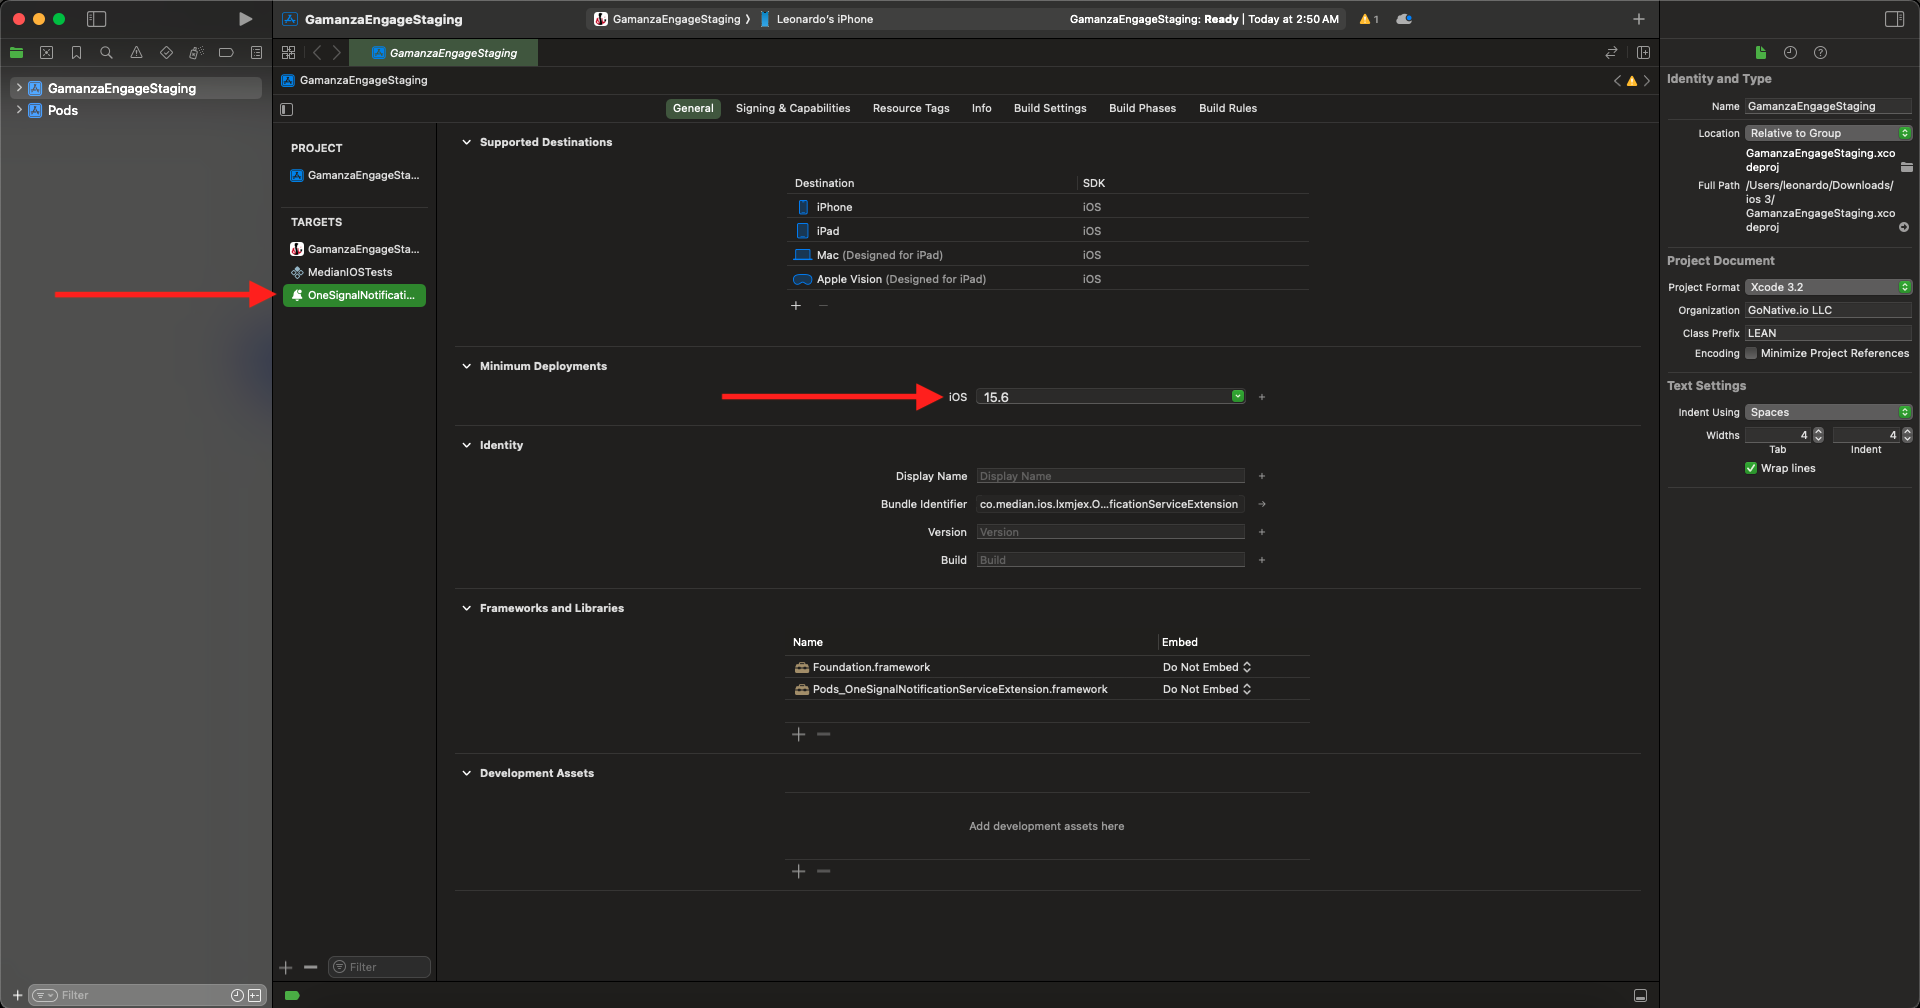
Set the OneSignalNotificationServiceExtension Target Minimum Deployments value to be the same as your Main Application Target.
3. Add App Groups
App Groups allow your app and the OneSignalNotificationServiceExtension to communicate when a notification is received, even if your app is not active. This is required for badges and Confirmed Deliveries.
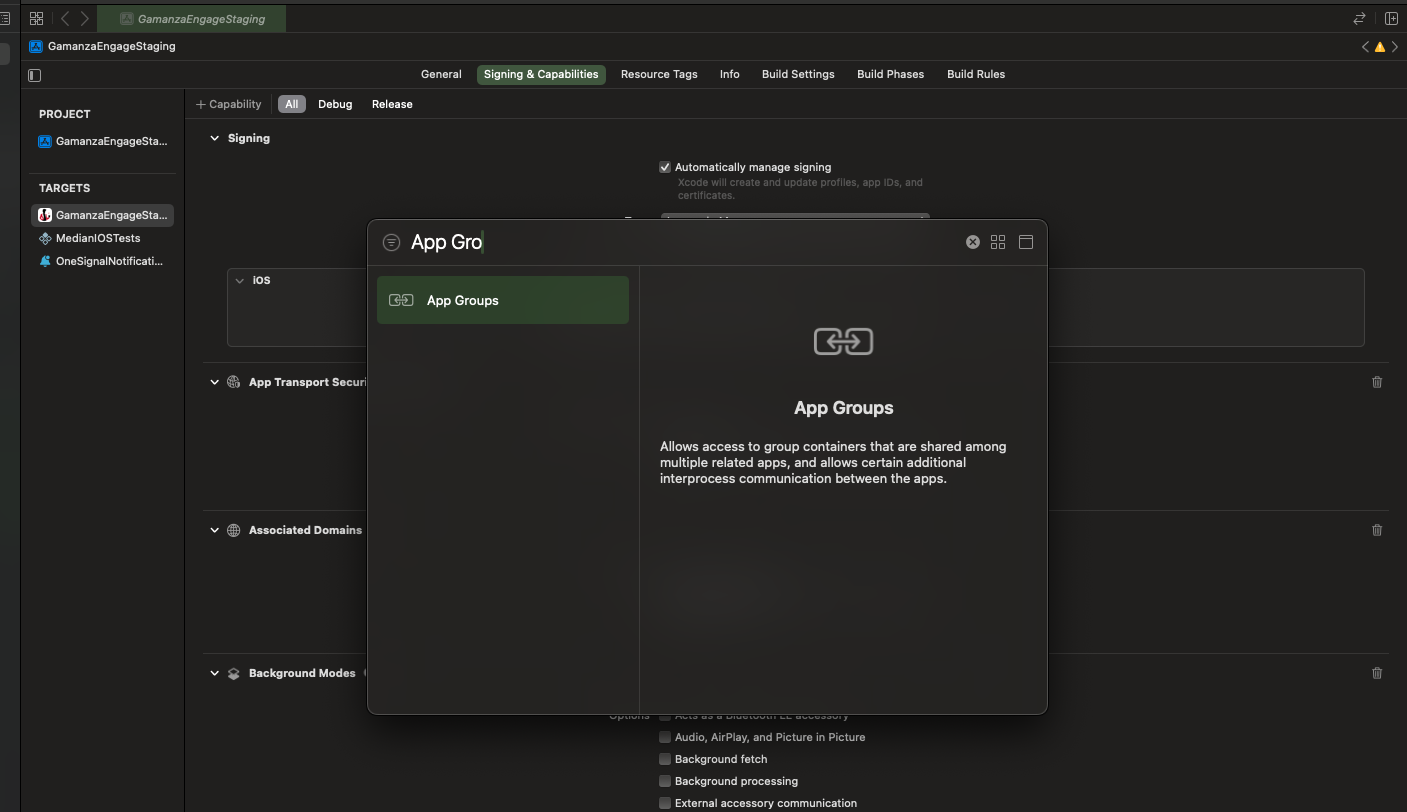
Select your Main App Target > Signing & Capabilities > + Capability > App Groups.
Within App Groups, click the + button.
Set the App Groups container to be group.YOUR_BUNDLE_IDENTIFIER.onesignal where YOUR_BUNDLE_IDENTIFIER is
the same as your Main Application "Bundle Identifier".
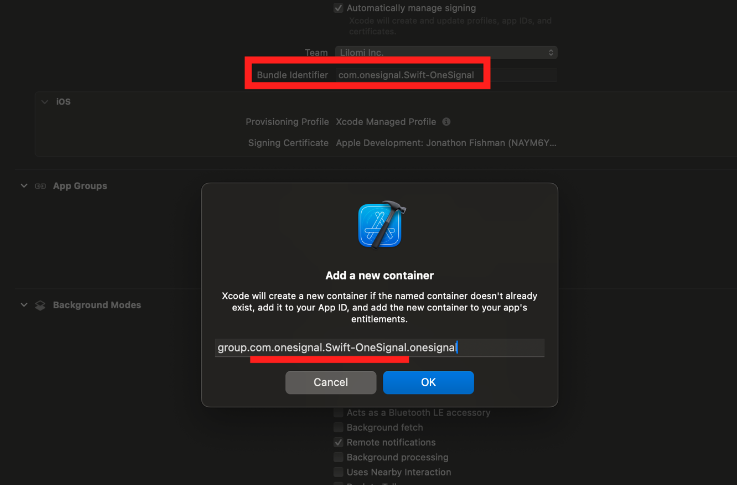
Press OK and repeat for the OneSignalNotificationServiceExtension Target.
Select the OneSignalNotificationServiceExtension Target > Signing & Capabilities > + Capability > App Groups.
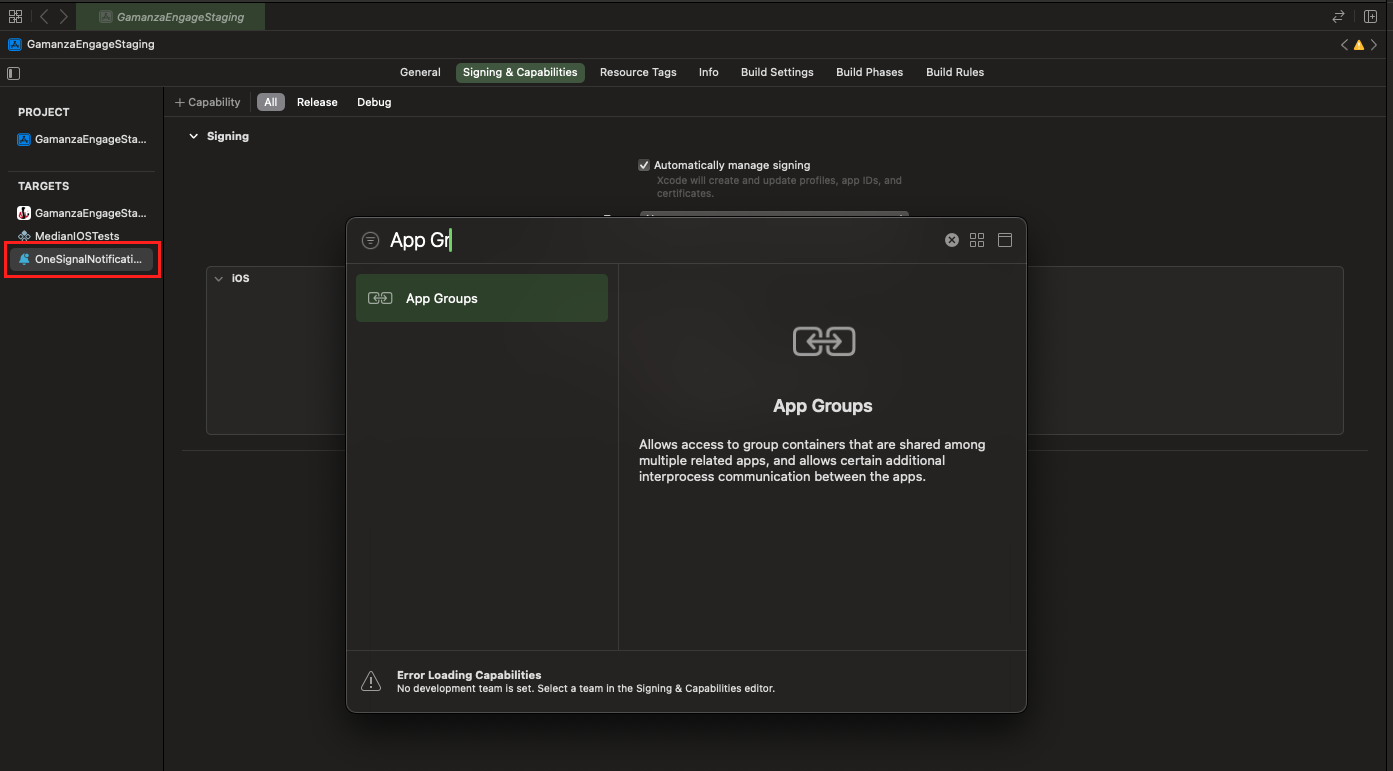
Within App Groups, click the + button.
Set the App Groups container to be group.YOUR_BUNDLE_IDENTIFIER.onesignal where YOUR_BUNDLE_IDENTIFIER is the same as your Main Application "Bundle Identifier".
DO NOT INCLUDE OneSignalNotificationServiceExtension.

Do not include OneSignalNotificationServiceExtension
For more details check the OneSignal official documentation Here: https://documentation.onesignal.com/docs/ios-sdk-setup
Configure OneSignal - Android
OneSignal sends push notifications through Google's Firebase Cloud Messaging (FCM) service. You will need to provide OneSignal with your Google Project Number and Firebase Server API Key.
Once you have a Google developer account set up, you may generate your Project Number and FCM Server API Key directly: https://developers.google.com/mobile/add?platform=android&cntapi=gcm
A complete guide is available on OneSignal's website at https://documentation.onesignal.com/docs/generate-a-google-server-api-key.
For more details check the OneSignal Official Documentation Here: https://documentation.onesignal.com/docs/android-sdk-setup
Median.co
If you are using Median.co to generate you Application we have good news for you!!!
You don't need to manually register the OneSignal subscription for your device users (players), if you have our Widgets configured in your website we can detect the Median SDK and the Median OneSignal Plugin and automatically register the subscriptions in our CRM.
Just make sure to configure/enable OneSignal in your Median App, and follow this guide to configure your iOS and Android builds accordingly to the OneSignal requirements
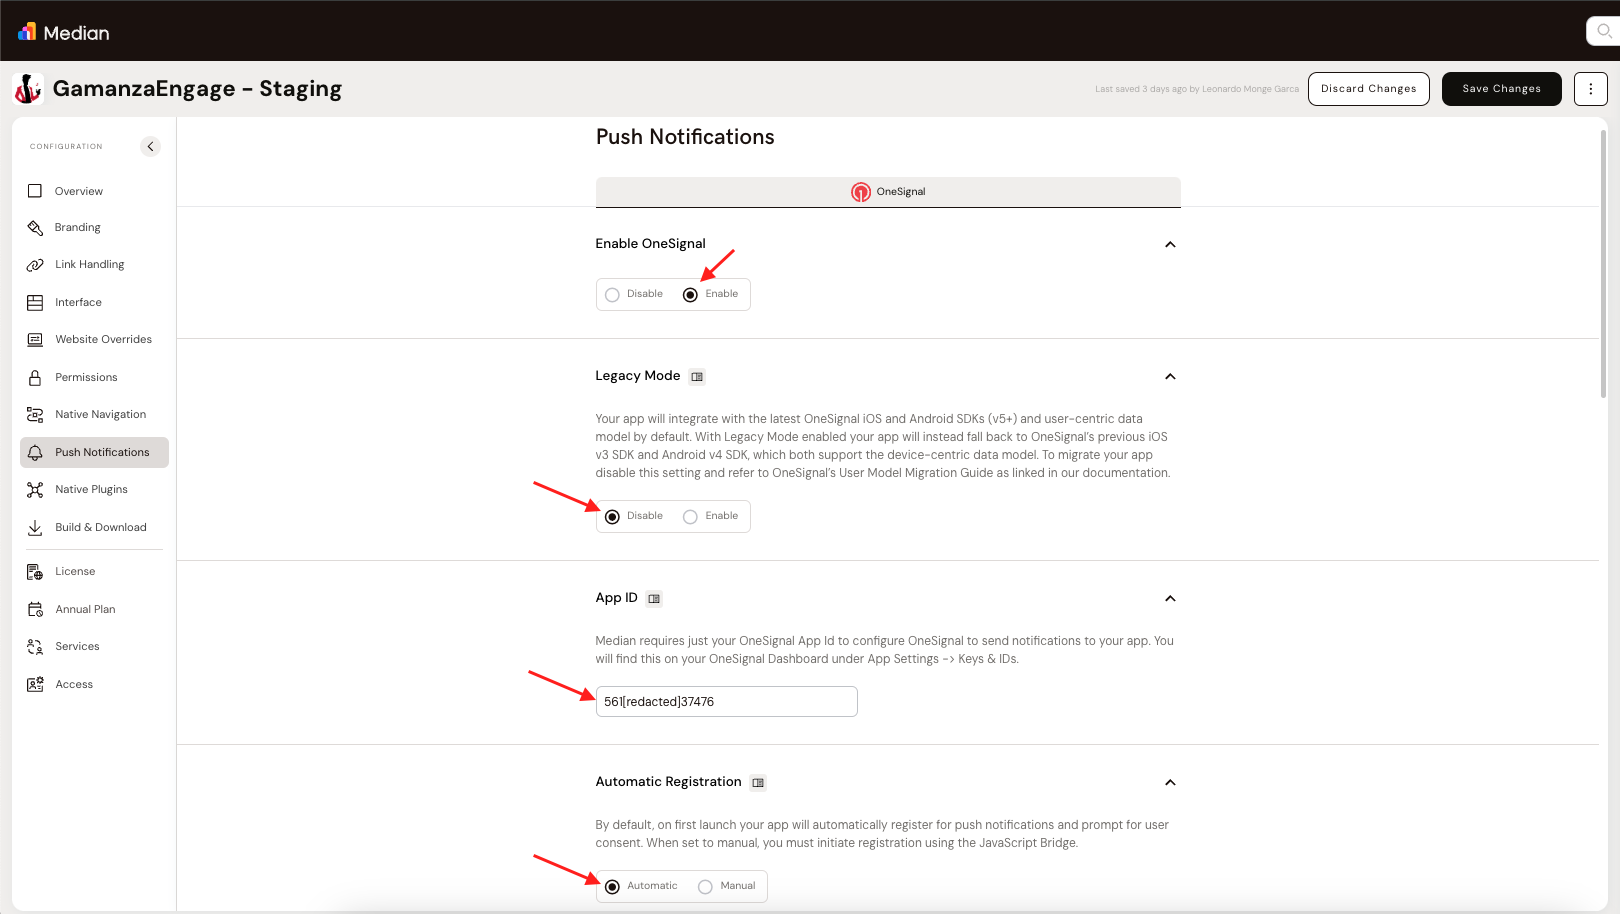
Here is the Median.co Official documentation: https://median.co/docs/onesignal
Even though you are using Median.co you need to perform the Configuration for iOS and for Android in their respective development environments prior to Publish to the App Store/Play Store
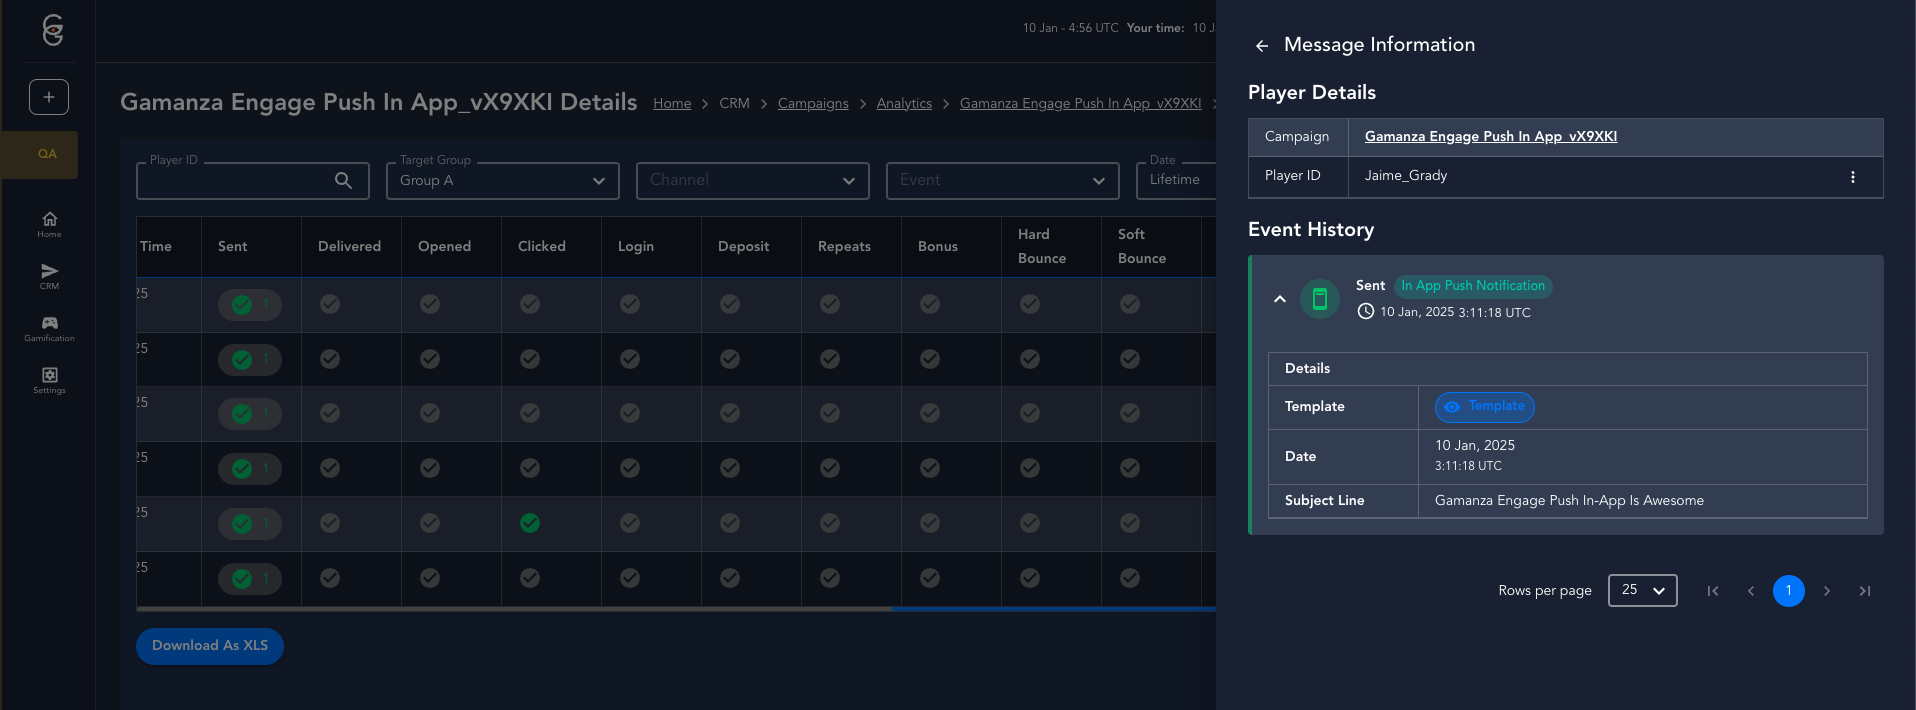
Push In App Analytics
To ensure have Analytics in our CRM please make sure to follow this guide:
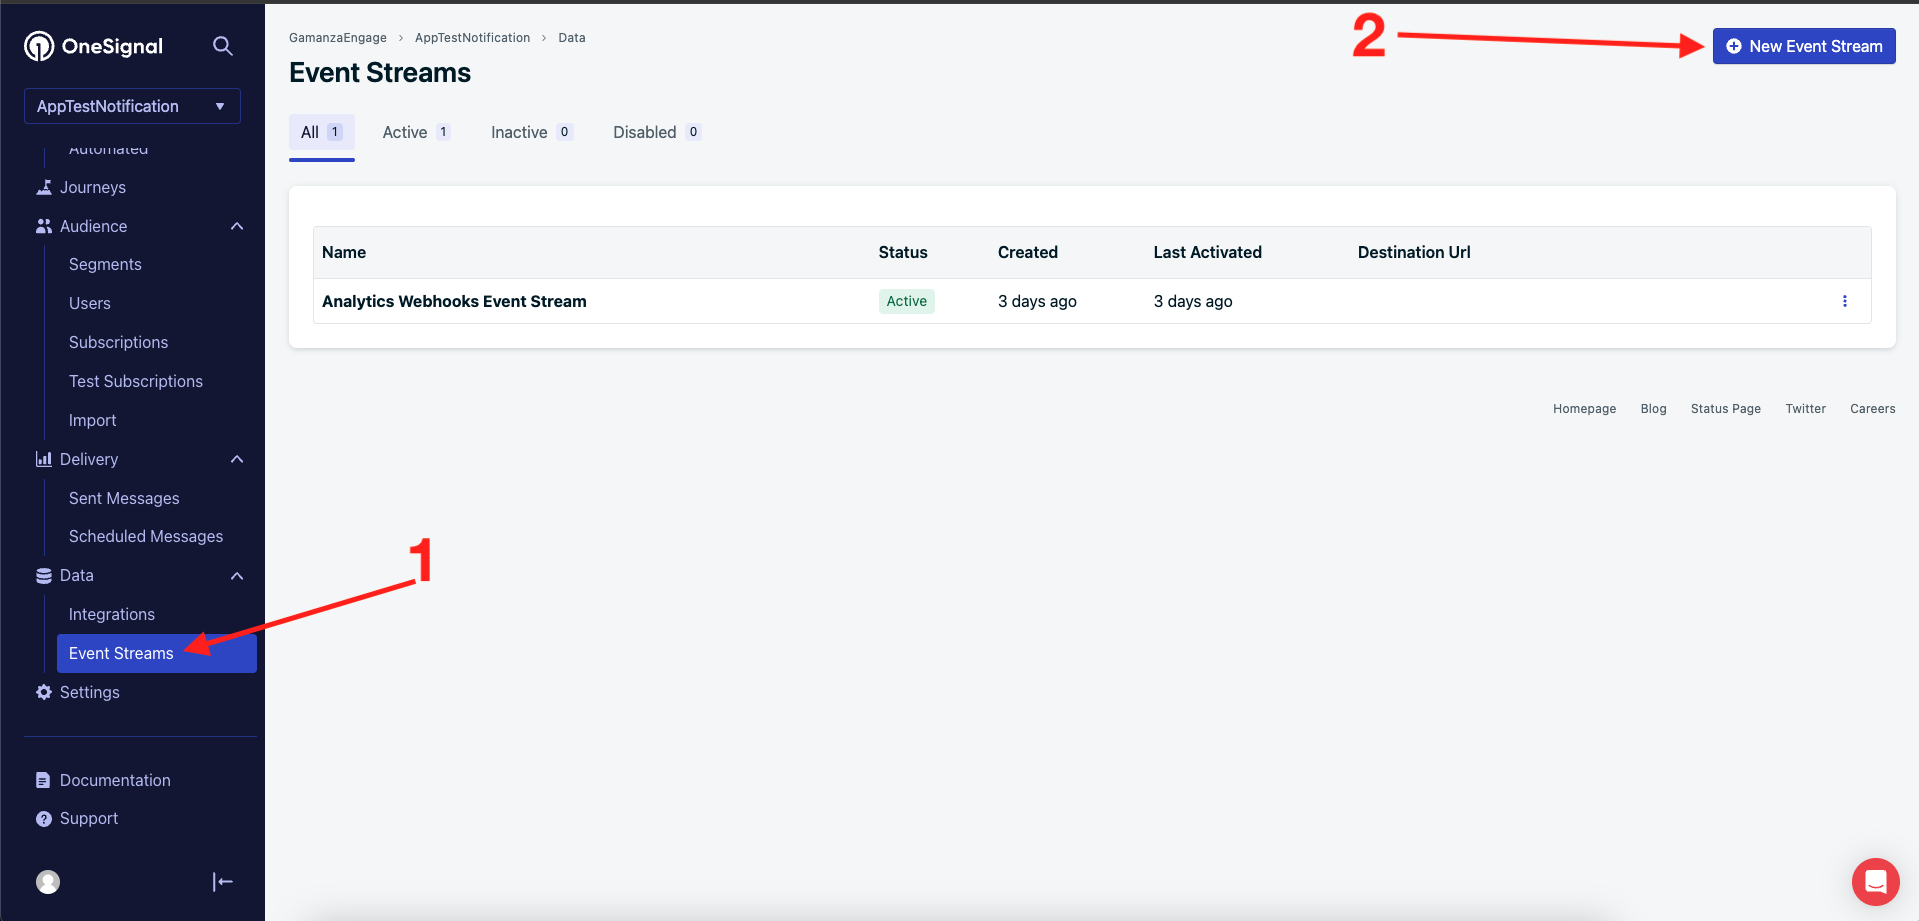
1- Create a new Event Streams
To ensure allow our servers to receive OneSignal events create a new event stream under the data menu:
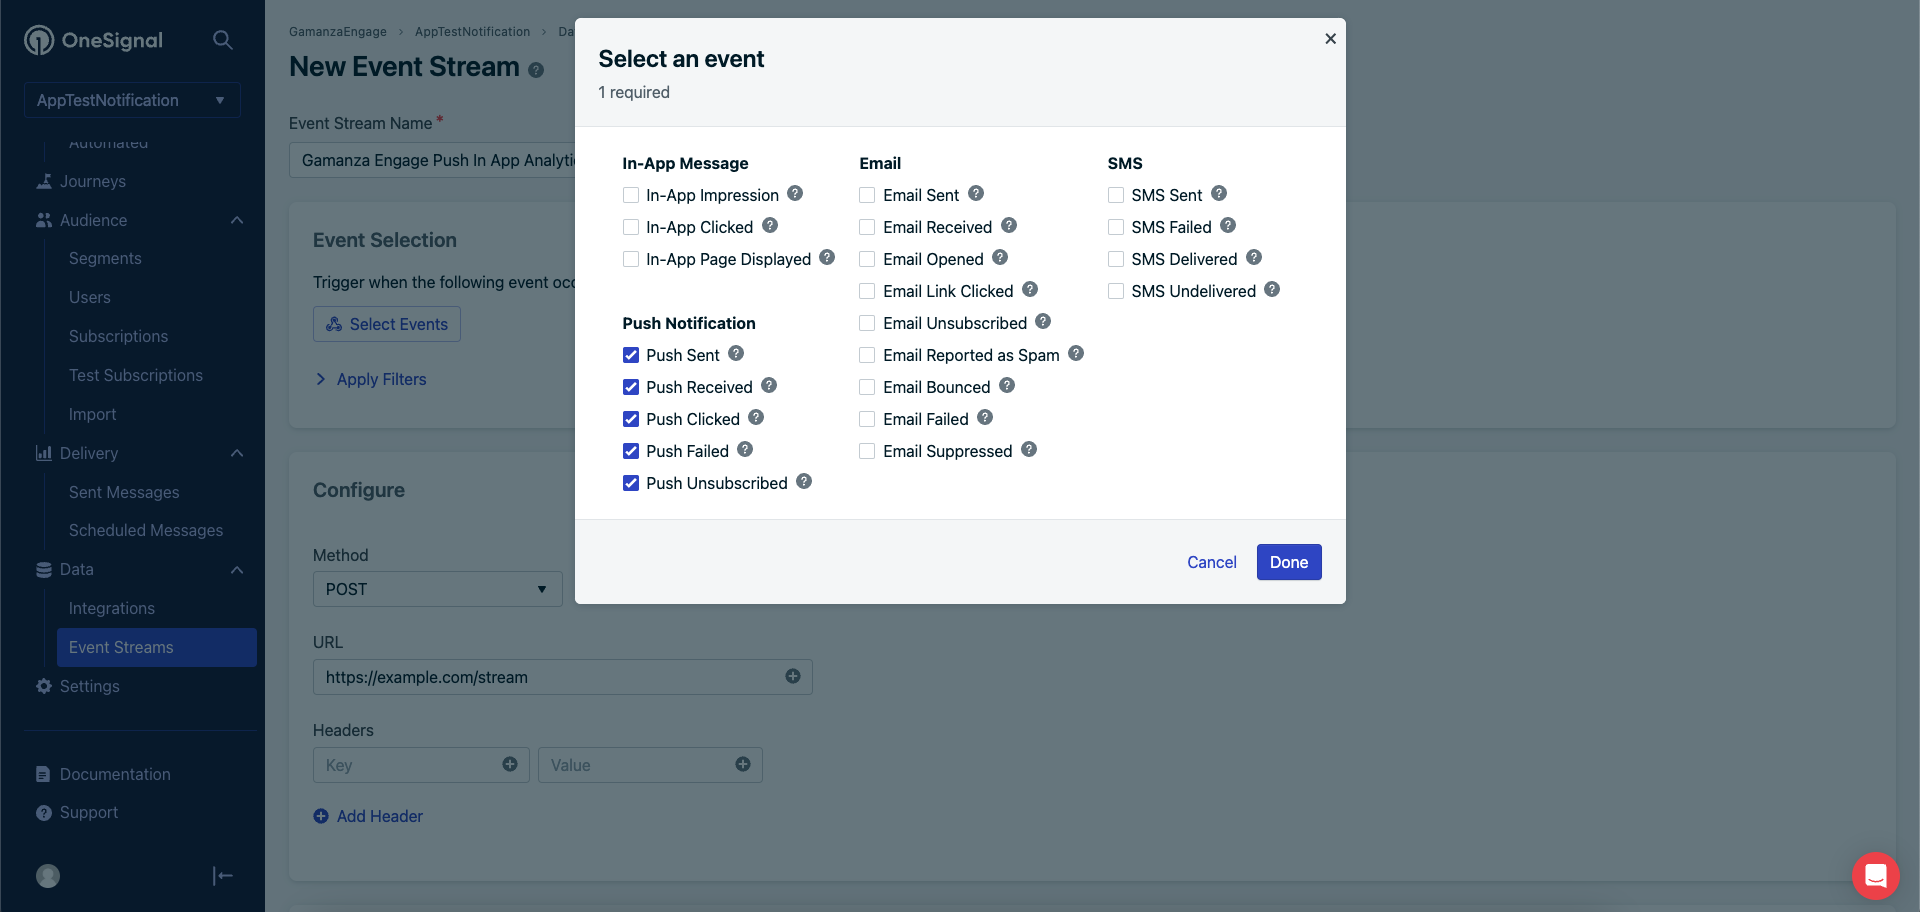
2- Select Events
Select all the events in the same way as the image below:
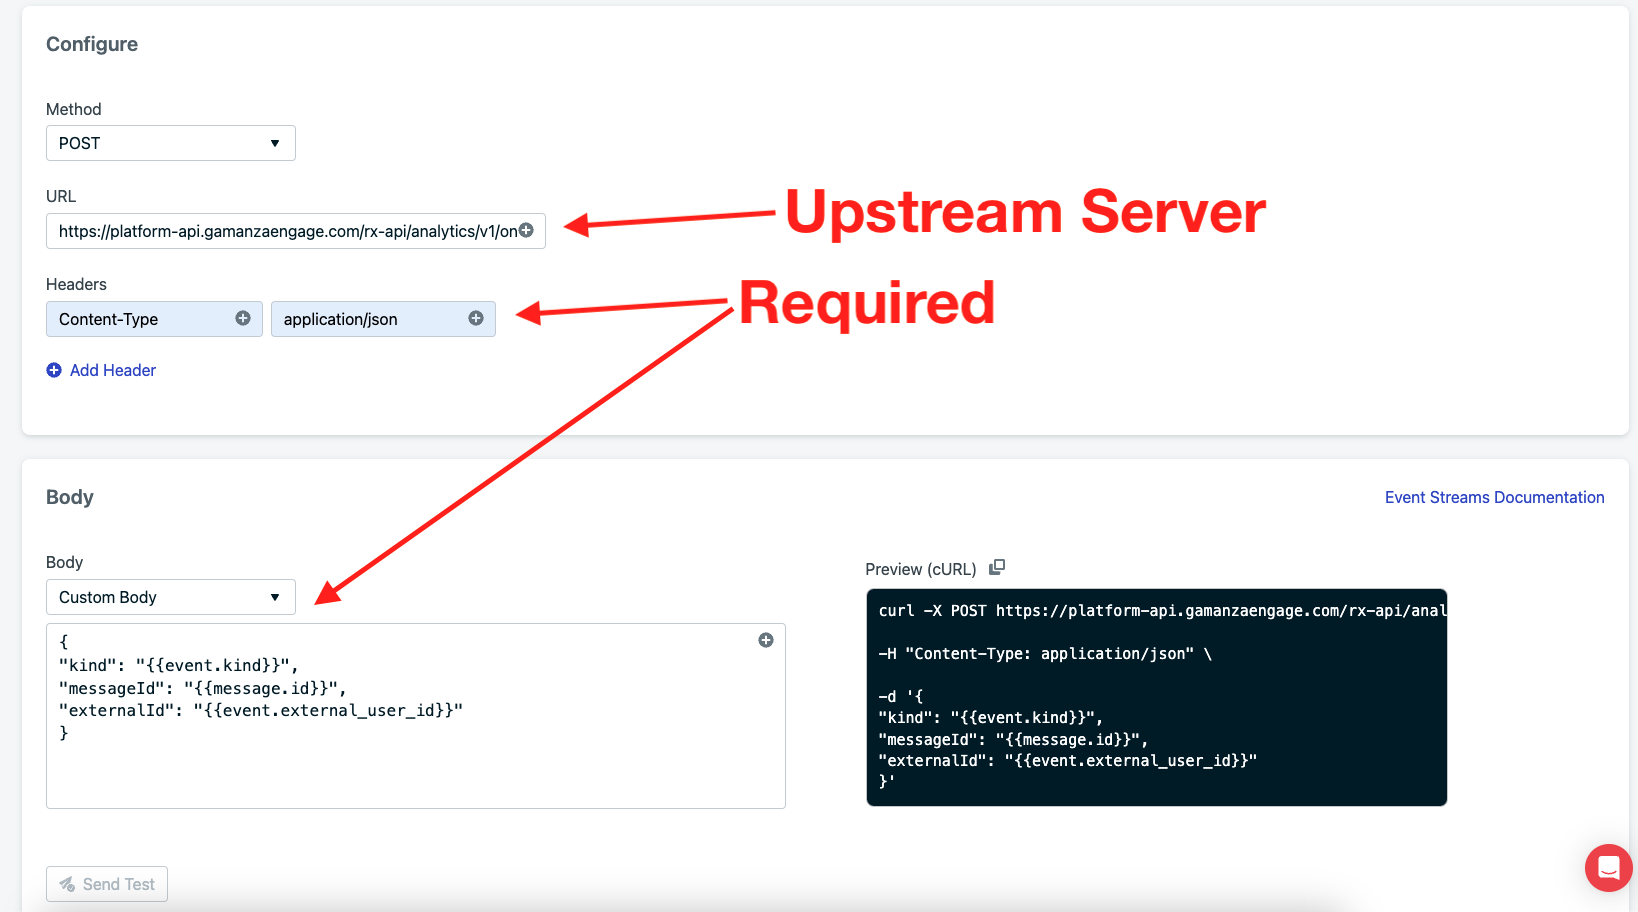
3- Configure the upstream server
Configure the upstream server using the Platform API URL provided by your CSM with the following path:
/rx-api/analytics/v1/onesignal/event/push-in-app
Full Example: https://platform-api-{customer-domain}.gamanzaengage.com/rx-api/analytics/v1/onesignal/event/push-in-app
Important:
- [REQUIRED] The method should be POST
- [REQUIRED] Make sure to add the Content Type header with value application/json
Body:
In the Body Section select Custom and add the following content exactly as defined here:
{
"kind": "{{event.kind}}",
"messageId": "{{message.id}}",
"externalId": "{{event.external_user_id}}"
}
If you follow this steps you can have Analytics for the Push In App in your Gamanza Engage CRM Analytics page.
If you have issues please contact your OneSignal Customer Service Team: Read this for some clarifications on OneSignal Delivery Confirmation and Events Stream: https://documentation.onesignal.com/docs/confirmed-delivery#requirements
Here you go, now you are ready to enhance your Engagement capabilities: